Wednesday, October 19, 2022

Apple Pandowdy Wednesday October 19, 2022

     Howdy, Apple Pandowdy. Pan-who-dee? P.A.N.D.O.W.D.Y. 

    Of course, this recipe's origins will never be known definitively but from what I've read, it dates back, at least, to colonial times in the North East. Also referred to as Apple Pot Pie, it is very much like an apple pie with only a top crust, with many variations, the one I chose to make has you dunk the pastry crust top into the apple juices about halfway through the cook time. Sounded interesting to me.

    I did adapt my recipe from America's Test Kitchen version, but, oddly, their instructions and the form of the recipe was very disheveled. It was downright annoying to try to follow it, you had to bounce from the top of the instructions to the bottom and back again. I am going to see if I can fix that. 

    Of course, I changed the type of apples they recommended to what I had on hand. They recommended Golden Delicious for their firmness, and recommended NOT to use Granny Smiths due to their deep tartness. I had Gala and Granny Smiths on hand. The Gala were fine, the Granny Smiths were way too tart for this 't application. I'll give ATK that one. The Galas held up fine, as long as they hadn't been cut too thin- 1/2 inch worked fine. 

So, here goes:

Cut 6 TBSP unsalted butter into 1/4 inch cubes and put in freezer for 15 minutes before you start.

Start the pastry first, as it has to chill for about an hour. 

ATK recommends using a food processor to make the dough, as I only have a mini one, it was not big enough, so I used my kitchen aide and finished with a pastry blender. I'll point it out as we go.

Mix 2/3 cup all-purpose flour (I use unbleached)

1 tsp granulated sugar and

1/2 tsp salt  until blended in a food processor or stand mixer or bowl

***add the 6 TBSP frozen butter cubes from freezer***

Pulse a few times until size of large peas (about 6-8 pulses) watch carefully if using stand mixer. You do not want to over process. If doing by hand/pastry blender/forks  cut butter in until size of large peas.

Mix 3 TBSP  ice water with 1 TBSP sour cream (sounds odd, but it worked fine)

Add water/sour cream mixture to flour/butter and pulse until there are large clumps and no dry flour left, scraping down the sides, 3-6 pulses. 20-30 seconds in stand mixer.

Remove dough from food processor or mixer or bowl press with fingertips into 4 inch disk and wrap tightly with plastic wrap, refrigerate for one hour.

While dough is resting peel, core and slice into 1/2 inch thick slices 2-1/2 pound  firm apples that will hold up to cooking (per ATK Golden Delicious work marvelously in this application- me, personally, am not a fan of any "delicious" variety- as I don't find them to live up to their name. But that's me. I do have to agree with ATK that Granny Smiths were way too tart. Next time I will either break down and try the Golden Delicious or my personal favorite for cooking, Cortland, if I can even get them in Florida. 

Mix 1 TBSP fresh lemon juice & 1/2 cup water in bowl. Add prepared apple slices to keep from browning. 

Drain apples well. To apples in a large bowl add 1/4 cup packed brown sugar, light or dark,

1/2 tsp ground cinnamon

1/4 tsp salt

Toss to coat apples.

Back to the dough:

Remove dough from refrigerator, and let sit at room temp about 5 minutes.

Roll into 10 inch round on lightly floured surface. Cut into 2-1/2 x 2-1/2 inch squares, the ends will be rounded but that works on the edges anyway. Lay pastry pieces out on a buttered flat pan or parchment paper covered pan and cover with plastic wrap and return to refrigerator for 30 minutes.

Start to preheat oven to 400 degrees.

Melt 3 TBSP unsalted butter in 10 inch ovenproof skillet on stovetop.

Add apple mixture, stir well, cover and let simmer, stirring occasionally over med-low heat for 10 minutes to start to soften apples and release their juices.

Mix 3/4 cup apple cider, 1 TBSP  cornstarch & 2 tsp lemon juice in small bowl until there are no lumps, add to apples in skillet, and cook for another 2-3 minutes stirring, uncovered until juice just starts to thicken.

Removed from heat and gently press apples down to try to get an even layer.

Working quickly, lay pastry pieces on top of apples, slightly overlapping, but cover most of the top of the apples. Brush pastry with 1 beaten egg, and  sprinkle w/ 1 TBSP granulated sugar mixed with 1/4 tsp ground cinnamon.

Bake at 400 degrees until pastry starts to puff up, about 15 minutes. Remove from oven, and with the back of a large spoon press the center of the pastry down so the juices start to run over the top. Repeat pressing the pastry fur more times around the edge of the skillet. return to the oven and continue to bake for about another 15 minutes until the top crust is golden brown.

Remove from oven, allow to cool at least 20 minutes on a wire rack. 

Serve warm, topped with vanilla ice cream.

  Still a lot of steps but it was very much worth it!

   Hope you enjoy this- it did end up very very delicious, and next time I will try other apples!


     Happy pandowdy! Until next time, Mangia!

~Aunt Barbara 


Bangers and mash Oct 18, 2022

 Just in time for National Pork month -bangers and mash! Bangers and mash, you say? What the heck is that? 

     Bangers and Mash is a British and Irish dish of sausage (bangers) and mashed potatoes with a savory onion gravy over the top. Sounds awesome to me! 
     Why are sausages called bangers? You ask? 
     According to the Spruce Eats (.com), “the British and Irish term “banger” is believed to date back to World War I, when meat shortages led to fillers being added to sausages, causing them to explode when cooked.” (Spruce 2022).
      I roared laughing at that because, even today, if you inadvertently prick sausages while cooking them, they explode with a rush of melted fat! 
       I don't know where I've been all my life that I had never heard of this dish until about 4 years ago when I went to a British pub in Venice, Fl with NaMaYA (Yvonne- friend since 1968) shortly after I moved to the great state of Florida. Saw this on the menu, gave it a quick glance and filed it away to be reviewed another day.

      T
      Today was that day. I picked up some sausage last week, tossed them in the freezer. The daily source of entertainment occurs  every morning when the husband and I look at each other and say, “what do you want for dinner?” We crack up, it’s practically EVERY morning! (But not tomorrow-we already know we’re having pot roast -discussed that yesterday-we had to plan around doctor visit.) But probably 25 out of 30 days a month we have this routine, and I call it that because it’s verbatim every time and we crack up-every time, even though we KNOW this conversation is going to happen. Anyway, I’m digressing… 
Onto the main reason for this post: Bangers and Mash!
    The instructions I got have you make this in three separate pots-one for the potatoes, one for the gravy, one for the sausage. Right off the bat I don’t get that…. Why why why?  So, naturally I changed it up a bit , but I did not stray too far. 
Sure, you boil and mash the potatoes in their own pot, I get that, but why can’t you do the gravy and sausage in the same pan? 
   Well, I did. I kept very on track with starting the gravy with slowly cooking down the onions., and adding the vinegar and sugar and simmering some more. But before adding the beef broth I removed the onions mixture to a bowl, cooked tree sausage, covered until 180 degrees, drainer their fat off, added the onions back to the pan, added the beef broth (and I used unsalted) let that go about 5 minutes then thickened up the gravy with a cornstarch slurry. Bam! Done! One less pot. My dishwasher (the husband)  thanked me for that consideration. 
     I have to say EASY, pretty quick, and downright tasty! This WILL be gracing my table again
Recipe courtesy of Spruce Eats: only alterations were used only 2 pans and substituted rice wine vinegar for the balsamic-didn’t have balsamic- you can also use apple cider vinegar, but add an extra teaspoon of sugar or whatever sweetener you prefer. 

Ingredients
1 Tbsp bacon fat
1 Tbsp unsalted butter 
2 Tbsp vegetable oil
2 medium  onions sliced thin
1tsp rice wine vinegar (or balsamic)
1tsp sugar (sweetener of your choice)
2-1/2 cups beef broth or stick
4 tsp corn starch mixed w/4 tsp water and a couple tsp hot broth(from pan).
One pack mild sausage any kind you like 5-6 links
Mashed potatoes ( I prefer russets but you do you-Yukon Golds or Red potatoes will work as well, I just prefer the fluffiness of russets.)
Instructions: Start by preparing your potatoes for boiling-peeled and cut into even sized pieces into cold water, once it comes to a boil add however much salt your family likes ( I tend to go light on the salt (my BP doesn’t like too much). 
     I’m not going to play-by-play how to boil potatoes, here, if you need pointers, ask, but I’m going to pretend you all know how to boil potatoes for mashing. (I’m praying over here).
     While your potatoes are cooking slice the onions into half rounds, melt the butter and bacon fat in the vegetable oil (no olive oil here, please), on medium-low heat, add the onions cover and cook low and slow about 10 minutes-you’re softening them not caramelizing them. 
     Add the vinegar and sugar to the onions and stir well. Cover with the lid and continue to cook for a further 5 minutes.
Here’s where I change instructions: remove onion mixture to heat proof bowl and set aside while you cook the sausages through. Use any method you want to cook the sausage -I usually start them in a pan with about 1/4 inch of water and let them stem , covered, for about 10-15 minutes. Remove the cover and check their temp-165 + is good, then I let the liquid evaporate and slowly brown the sausages on all sides until nicely browned. Drain off any excess fat, add the onions back to the pan with the sausages, add the 2-1/2 cups broth, simmer 5 minutes. Thicken the gravy with a corn starch-water -hot broth slurry and bring to a boil, boil 1minute, then lower heat and let simmer  about 5 minutes until gravy is slightly thickened 
Plate your mashed potatoes, put 2 sausage atop, top with the gravy. 
   Serve with any vegetable or a lettuce salad. 
   Man-o-man, easy but dang good. Husband gave two thumbs up...can add this to the meal rotation. He actually said, "please add this to the dinner rotation." 
Win-win in my book. 
    Now to get my photo to post...
    If you decide to give it a try, I assure you, if you like all the ingredients, and follow the directions, you should like this!
    Until next time...mangia!


Saturday, February 12, 2022

Roast Pork w/Apples & Sauerkraut Thurs Feb 10, 2022

    Roast loin of pork. The words, alone, starts me salivating! Then, adding the garlic, apples and sauerkraut and man! The aroma slays me! 

    Years, and I mean year ago I was introduced to this delicacy by a family of German decent. They also introduced me to pierogis, but that’s another blog post, maybe, someday. Sad to say I don’t recall the family’s name, or much else except walking into their house and being bowled over by the aroma coming out of the kitchen. Mmm mmm good! 

    So, I learn that what’s cooking is a bone-in loin of pork - NOT a tenderloin- that’s a different piece of meat- and I learned that leaving the bone in takes this cut a whole level up- especially because, well, I hate to admit it, but I LOVE gnawing in the bones. Eww—when I think of it, but I own it- pork chops, rib steaks, lamb chops- leave the bones in - fish? Not so much!   But I digress! 

    Put little slits in the flesh all the way around the roast and stuff the little slits with slivers of fresh garlic. Mmm. You don’t have to do anything past that, as that combo alone is heavenly.  I dredged the roast in flour that is mixed with a small amount of salt, pepper, garlic powder and mustard powder. Brown the roast on all sides to start rendering the fat. 

    I took a jar of sauerkraut mixed in some diced apples- I always use Macintosh type  apples, and spread the apples and sauerkraut around the outside of the roast in a roasting pan. 

      Roast uncovered at 350 degrees - 20 minutes per pound. 

The meat was done in an hour (when you’re cooking for one it tends to go faster. ) I took the meat out to rest, but I popped the pan with sauerkraut back into the oven for about 15 minutes to get it browned. I’m normally not a fan of sauerkraut but when it’s sizzling in pork fat, and turned brown, omg! I’m in love. 

     
     I pulled the sauerkraut and apples out of the pan, added enough butter to the drippings to equal 3-4 tablespoons- then added flour (made a roux) cooked the flour to a medium brown, added some chicken stock. Whisk, bring to boil; boil and whisk until reduced slightly and thickened. 
    Served it with mashed potatoes. Put sauerkraut and apples over sliced meat. 
     It came out awesome, with enough leftover roast pork for sandwiches. Sweat onions and garlic in olive oil, add thinly sliced pork and quickly sauté until hot. Served on rolls with duck sauce. Mmm mmm mmm. 
     That’s all she wrote!
      Let me know how yours came out! 
      Until next time! Manga’! 

Thursday, February 3, 2022

French Onion Chicken February 3, 2022

     My recent “windfall” of a decent price for boneless breasts of chicken allowed me to try out a few recipes that have been sitting in my inbox FOREVER.  This is one of those that caught my eye and I was determined to give it a whirl. 

     French Onion chicken is not much more than chicken cutlets, cleaned and pounded, dipped in a mixture of melted butter, Worcestershire sauce and dry mustard, coated with crushed French fried onions put in a baking dish with the excess dip poured over and around and baked for 20-25 minutes. That’s IT! And yet the flavor is to die for! 

     The aroma alone, while it was baking, drove me crazy. It came out tender, yet crispy on the outside and the combo of the Worcestershire sauce and mustard? Who knew?  Jan! I love when you stumble upon something that’s easy yet tastes superb! This meets both head on. 

  • Recipe courtesy of Taste of Home
  • 1/2,cup butter, melted
  • 1 tablespoon Worcestershire sauce
  • 1 teaspoon ground mustard
  • 1 can (2.8 ounces) French-fried onions, crushed
  • 4 boneless skinless chicken breast halves (4 ounces each)


   You know the drill. Clean all the nasties off the breasts and slice them into cutlets (I get 2 per breast with a couple fingers or nuggets (depends on how accurate my knife skills are on any particular day). Put pieces between two pieces of plastic wrap or parchment paper, and pound with a mallet (or bottom of fry pan) to 1/4 inch thickness. The more even you get the pieces, the more evenly they will cook. Just takes practice. 

   Of course, don’t totally obliterate the chicken, which can be done. Do you have to ask how I know that? Trust me, refrain from wailing on these things you can lose them  - and at the cost around here, that’s not something  I’m interested in! 

   Bake them in a greased 11x7 dish  @ 400 for 20-25 minutes. You know the drill - until internal temperature reaches 165 degrees. I ALWAYS cut into a thick piece to make sure there’s no pink left- eating not fully cooked chicken can give you salmonella and that is not fun either. No, I cannot definitely say I’ve had it, but… I do have gastric issues after handling raw chicken. I swear it seeps through my skin. Oye vey, right? 

     I served this with buttered noodles and steamed broccoli. It was too too, too good. It’s going in my “often” list - was as often as I can find reasonably priced chicken, that is. 

   I thought the butter/Worcestershire/mustard combo was so good I’m thinking of trying that and dredging cutlets in breadcrumbs, and frying them . Why not, right? Take a piece of this recipe and mix it with a piece of another. Makes for new flavors. I think I’m gonna Give it a try. 

     Til next time ! 


Source: Retrieved 1/31/2022 from https://www.tasteofhome.com/recipes/tasty-onion-chicken/ 


Wednesday, February 2, 2022

Chicken Piccata February 1, 2022

    I rarely buy chicken since moving to the great state of Florida. I have NO idea WHAT they’re feeding them, but I’m thinking it’s gold plated because I cannot account for the price being DOUBLE what I was paying up North. True story. In NY I was buying chickens for $.99/ lb. The least expensive here that I found was $1.69, but usually closer to $1.99/ lb. I have no words, no explanation and it kills me to fork over that much money.

     Wait. Boneless chicken breasts in NY would go on sale, very often @ $1.99/lb., regular price about $3.99/ lb. We always waited for the sale. Here? I have only seen $1.99 boneless chicken breast twice. (because i no longer look at them) Their free range chicken (boneless) I've seen at $5.99/lb, to a staggering $8.99/ lb. Hey, Love you, Mr. George (founder of the big supermarket chain down south), and I know you only stock the BEST-BUT... $9 a pound for chicken ANYTHING???!! Wait! wings? Back in the '60's they used to give them away. Here? They're $4.99/lb. 

     Get the picture? I hate buying chicken since I moved to Florida. However, I came across one of those extremely rare weeks of boneless chicken breasts on sale for $2.39/ lb.!  That is only $.40 /lb. more than I paid 5 years ago. I'll write that off as inflation and pay that extra $.40.

     So, I got some boneless chicken breasts. Last night I made French Onion chicken, another recipe I highly recommend AND will blog about  sometime in the future. I had stumbled upon a recipe for chicken piccata on Sunday. Lemon...mmm. Yeah, chicken piccata went right on the "TO DO" list. And do it, I did. OMG! where did I learn English? (Let's write that off as too long away from the blog and expressing myself on topics I choose, as opposed to my last several years. Let's just leave it there; suffice it to say, I now have time to do "ME". I'll brush up on my English usage and sentence structure (which, as you can tell, is all over the place.) You know what? I don't give a HOOT. (Inside joke, there.) This is how I think, this is how I talk. If only all my talking (to other people) had the benefit of backspace, delete and edit. That would be awesome, but reading this you can tell what's going on in my brain (here's your hint.) You can't tell me that you don't have a conversation (in your head) with yourself while you're interacting with other people. Whether thinking about the drive home, the battle you're gonna have with one of your sons about a "party", saying a silent prayer you're not about to get bad news, I let you see where my brain veered off to. (OOPs!)

     Chicken piccata. The words alone bring a smile to my face. Chicken Piccata is Italian, and that's where I first had this. In Rome; I was 17, on a school trip to Rome and Florence (with a side excursion to Pompeii, Capri, and Naples for dinner.) I could talk about that trip forever, because it forever changed my life, but that story doesn't belong here, but it does on my other blog, the one about living a graceful life, so I'll leave that stuff to that blog. We went for 13 days/14 nights (or the other way around) with 2 meals a day, tours, a guide, Anieck. For a while after that trip I wanted to be a guide in Italy, but, well, you know...life. 

     Anyway, being in Italy everyone was expecting tomato/pasta heavy foods: ravioli, lasagna, spaghetti and meatballs, Manicotti- you get the picture, but that is not what was for dinner. It was my introduction to Mediterranean food. Oh, man! We go to the table (complete with cloth tablecloths and napkins- although this is ITALY, no take-out; no to-go; and no ice! Yikes!). We’re NOT being served tomato sauce and pasta and cheese. And there it was! chicken piccata sitting on my plate. Served with a rice pilaf, mixed green salad and asparagus. Lemon slices, with the fresh lemon aroma wafting up into your nostrils. Okay, stop.

    And that is what I attempted, and, well, yes, nailed!

    As my head is still not completely back to thinking straight, I kept losing the recipe I had found that was exquisitely simple. But I remembered SOME of the ingredients. This happened a total of 3 times. Something in Ina Garten's version caught my eye. Then a recipe off the Food Network intrigued me, and finally I found the original one that I wanted to try. 

   Well, I liked different parts of each. So I took out the parts I thought would work really well and the result?

    No word of lie: FABULOUS!

    I was cooking only for myself so I used only 1/2 chicken breast (boneless) "which I slice down and "fileted" I got 2 nice size cutlets and 2 "fingers" or maybe nuggets. (Pound them between wax paper to 1/4 inch thick- YES you must flatten the cutlets- tenderizes them- skip it and you might have chewy chicken which is NG in my book.)

    Here's the ingredients:

  • the prepared boneless chicken as described above   

  • 1/4 cup flour  
  • 1/4 cup parmesan cheese
  • 1/3 cup fine bread crumbs seasoned 
  • black pepper - 5 or 6 twists
  • 1 egg beaten w/1 T water
  • 1/8 t hot sauce 
  • 2T avocado or grapeseed (or vegetable oil)
  • 2 T butter
  • 1/4 cup very dry white wine
  • juice of 1 lemon (i had just under 1/4 cup) use the nuke and tongs method
  • remainder of 2 lemon halves
  • 1/2 cup reduced sodium chicken stock or broth
  • 1 T capers, rinsed and drained 
  • fresh parsley, chopped 
  • sliced lemons for garnish   


  Mix the flour, parmesan, bread crumbs, black pepper in a shallow bowl or dish. 

  In a separate dish beat egg, hot sauce & water.

pat chicken dry, dredge in the flour mixture, into the egg mix and back into the flour mixture. Set aside on a rack to dry while you coat the rest of the chicken. 

   Heat oil in sauté pan. Brown chicken for 3-5 min each side until juices run clear. Drain on paper towel set aside but keep warm. Finish all the chicken.

    Wipe out pan. Add butter to same pan. When it melts and starts to boil add the wine, then the lemon juice, the half lemons, then the stock. Bring back to boil and simmer until reduce by 1/3 - remove the lemon halves and discard. Toss in the capers. Stir and remove from heat.

    Plate chicken, drizzling sauce over, place lemon slices, twisted and sprinkle w/fresh chopped parsley. Serve with buttered noodles, rice pilaf (or rice), green beans, broccoli or asparagus.  The lemon sauce goes nicely on the vegetables, too.

   Mind you, there is not a lot of sauce, so if you're thinking of drowning your chicken and/or veggies, you need to at least double, if not, triple the recipe.  

   Word of advice: do not use jarred lemon juice- just does not cut it.

    I want more. 


    Admittedly I forgot the parsley on top. 

    Oye! Am I out of practice! Not a question. 

    So I put the rest of the chicken in the freezer in each their own little bag. I need only one breast per meal, so I got a few more meals. Of course my signature dish, chicken cutlets w/Swiss cheese sauce is a definite maybe! And I will blog about the French Onion chicken, too, That, too was good! And easy.
     Maybe I should just post  the recipes and shut up. Nah! 

     Until next time: enjoy! Mangia!

~Aunt Barbara aka No-No. (Nonna)


Friday, January 28, 2022

The Stocked Kitchen™ Moo Shoo Shrimp January 28, 2022

  I am full-on in a Chinese inspired period right now. Crispy Orange Chicken and Crispy Orange Beef earlier this week and now, today, Moo Shoo Shrimp- the Stocked Kitchen version.

    Several years ago I discovered a stocking method for your pantry that, if you keep certain items in "stock" in your pantry you have only a few fresh items - produce and meat to get to be able to make over 300 recipes. Its all described in the book by the mentioned name, The Stocked Kitchen by Sarah Kallio and Stacey Krastins; Find it on Amazon here.

     Some years ago I started building this method in my kitchen, and although I never fully got it up and running, by following their shopping list I was able to pull together some really good meals from my "stock". I've made this particular recipe many times, in the past, and since I'm attempting to get this off the ground again, I figured why not go with a tried and true? 

     The thing I'm noticing about the Chinese-style recipes is that there are a lot of ingredients, a lot of prep, but man, once all the sauces are prepared and the meat &/or veggies are prepped the cooking goes pretty quick. And they are tasty!

     Of course, as usual, not liking mushrooms I ALWAYS leave them out, especially if the recipe calls for canned mushrooms, as this one does. Not a fan at all. Not that I'm a fan of fresh mushrooms, either, but I can tolerate a mushroom or two if they are allowed to crisp up- the Big E used to make a pan of mushrooms and onions for Thanksgiving and by the time he was done with them they were almost like chips- I could eat them that way, but that takes forever to get them to that state, so I just skip them. Of course, in your kitchen go ahead if you like them. Your kitchen, your rules.

    Okay, so.... I found that using a smaller size shrimp is best with this dish, but, as usual, I found the best price on the 16-20 per pound size, so I cut them in half. I also learned, in the future not to use angel-hair Cole slaw mix, but that was the only one the store had when I ordered, so I tried it. did not like the texture, too stringy, but the flavor was still good. In the past I have also shred fresh cabbage, too, but as I am not 100% myself yet, I took the shortcut. My scallions were on their last day, too, so I was a bit light on them. Claiming Post-Covid brain. Whatever.

    As usual you start by mixing up the sauce- as I previously mentioned there's a list of ingredients. but mix it up and set it aside to blend together. One thing that always got me on this recipe is that there's peanut butter in it, but you do not taste peanut butter, I'm assuming that's because the ginger, garlic, soy sauce, honey and hot pepper sauce overpowers it, but whatever, its in there, although i cannot pick the flavor out.

Sauce in a medium measuring cup mix:

  • 1/4 cup soy sauce ( I always use lower sodium)
  • 1 T peanut butter (smooth, please)
  • 1 T honey
  • 2 tsp white wine vinegar 
  • 1/8 tsp garlic powder
  • 10 drops Tabasco or hot sauce  (I use Frank's)
  • 2 T pureed ginger
 Whisk up and set sauce aside.

  • 3 eggs  beat the eggs with 
  • salt & pepper to taste (trying to watch my sodium I leave out the salt)
set aside;  
  • 2 tablespoons vegetable oil ( I use avocado or grapeseed these days)
  • 12 oz to 1 lb raw shrimp, peeled completely (take those tails off) deveined (please) best to use 31-40 or smaller size, or cut larger ones in half crosswise
  • 1 clove garlic minced
  • One 4-oz can mushrooms drained and chopped- or you can use fresh if you care to, but I cannot advise if 4 oz fresh will be the same as 4 oz can-- you can try it and let me know? Maybe?
  • 3 cups cabbage and carrot mix (cole slaw mix from produce section) I do not recommend using the angel hair size, though, and by all means shred you own if you care to.
  • 3 green onions thinly sliced on an angle
  • hot cooked rice (Jasmine would be divine!) or flour tortillas for serving ( i recommend the burrito size, as I had the soft taco size and they presented a problem with being rolled up- they were too small. 
    When you get a moo shoo dish from a Chinese restaurant, you get "pancakes" with them, and I have tried to make them; let me tell you they are more trouble than they're worth- they're thinner than crepes and tear and make one of my famous "messes" so when they suggested to try flour tortillas instead I went that way and I am glad for that option. I usually use the tortillas and roll the mix up burrito style 

   Heat a fry pan on high heat, add oil and heat until very hot. add shrimp and stir around until pink.

   Add the egg mixture and scramble around for about 2 minutes. You want fluffy pieces of scrambled egg.

   Add the garlic, mushrooms, if using, cabbage mix and green onions and cook and stir until the green onions are tender- it only takes a couple minutes.

   Serve over hot cooked rice or roll in warmed flour tortillas like a burrito. 

   Please note, the cabbage releases water so there is a considerable amount of liquid and the wrapped version can be drippy and messy. Still good. 

   Photo does not show it wrapped 


   As time goes on I will happily share more of these recipes but please be sure to check out the book yourself!, In the back of the book is a shopping list you can use to help you stock your kitchen! No , I get nothing for referring you, but you get lots of recipes and suggestions on how to stock your kitchen so you can make these fabulous recipes.

   Until next time! 


Sources: Sarah Kallio and Stacey Krastins: The Stocked Kitchen - One Grocery List ... Endless recipes/Atria Books 2013 pg 206


Wednesday, January 26, 2022

Crispy Orange Beef Wed, January 26, 2022

      Hello!  Hello!  Been a long time, but I think I might FINALLY be able to start paying this blog some attention. Operative word: might. 
     So, what have all you been up to? Me? RETIRED - mostly at least- I went from working 52 hours a week to a mere 13! So far, so good. Well, if I hadn't started out the year being ill, that is. But I am starting to feel human again, so maybe I can get on with life?

     So, what's new here is that I suddenly have been plagued with cravings for Chinese-type foods. Made Crispy Orange Chicken last week, and when I make it again I will add it here, but last night I went for the Beef version.

     So let me tell you a bit of background. I love steak. I grew up eating grilled steak just about every single Saturday night from the beginnings of my memories until I left my parents house at 23 years old. Sirloin, shell steaks, London broil, and flank. After leaving my parents home I discovered filet mignon, T-bone, porterhouse, and then onto Delmonico, only to culminate with my all-time favorite bone-in Rib steak. The absolute ultimate in this person's steak-eating world. There is nothing and I mean nothing finer than a perfectly medium-rare bone in rib steak, just a pinch of salt (watching my sodium intake, thank you, but cannot give up a pinch of salt on a hot grilled juicy piece of steak.) 

      My husband, on the other hand grew up eating chuck steaks and sirloin. He will agree with me, if you were to ask him, that rib steak is the A #1 top of the line steak. Of course, we veered off that course while we had three boys growing up, who could afford that, right? We discovered chuck-eye steaks, which are now nearly impossible to find. Yeah, the rest of the steak eating world discovered the eye of chuck, marinated and grilled to medium or medium rare offers a flavor that is nearly as tasty as a rib steak, for a lot less money. Problem is I haven't seen a chuck-eye in a store in over 10 years. OH, bother.

      So, early on I reached into my bag of tricks and brought home a flank steak one day. Turns out his mom would use flank to make braciole, a rolled and stuff piece of beef that is browned and cooked in spaghetti sauce. There's another topic we can get into in another post. 

     He had never had flank in any way other that braciole, and I only had had it marinated and grilled. I bought one from the local butcher one time, and the butcher even squawked, "the worst cut of beef ever"  to which I asked why. The butcher went on to tell me it was tough and stringy. And right there, I taught a butcher something. How to properly slice a flank steak so it was not tough and stringy. 

     You have to slice it, against the grain keeping the knife at a 30-45 degree angle, almost like shaving the beef into thin slices. Problem solved. Tender, not stringy, extremely tasty and no waste. Win-Win. Seeing the butcher again weeks later, he told me that he tried my slicing method and since has changed his opinion of the cut. 

     So, imagine, if you will, coming across a recipe that cuts this piece of meat that can be tough and stringy before it is cooked? I looked at the recipe and gasped! Sacrilege? I have always been of the school that you cannot cut beef before cooking it because it shocks the muscle and makes it tough ( I'm not a fan of store bought stew beef for that every reason, however, I am known to cut up my own chuck steak or London broil for stew, don't ask me why that doesn't toughen it up, can't explain the phenomena...?) 

    This crispy orange beef recipe does just that: takes a perfectly good flank steak and cuts it up before dredging it in cornstarch and cooking it. Imagine my surprise that this actually came out more tender than simply grilling this steak that had marinated in an butter, onion, &Worchester sauce . OMG! How can this be? ALL my beliefs have now been thrown out the window... Live and learn, I guess. Live and learn. 

    So there are no photos of this dish because I made a total mess of my kitchen in preparing it. No, really this is not a recipe for a messy cook (like me) but you know what? I don't care, I'm making it again, it was THAT good! 

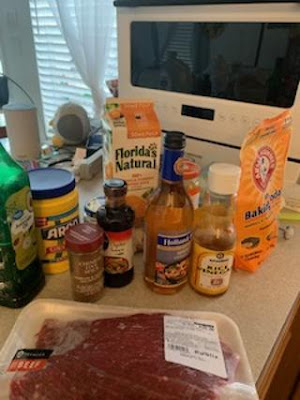
     The other "issue" is that it has a lot of ingredients! See photo below:


    Oye vey! But I got through it and man was it good! Of course its not my own recipe, here's the link:

Crispy Orange Beef -Woks of Life

    Let me know if you try it and how it worked for you. Me? I'm making it again! (After I scrape up all the cornstarch) LOL.

     I will also post about the Crispy Orange Chicken, which is a completely different recipe than this, but it was also very, very good. 

    I currently have all the ingredients to make Moo Shu Shrimp and its on the agenda for this week so hopefully, my plans will pan out and I'll be posting again real soon! 

    Thanks for hanging in there with me, I know, I'm not as attentive here as I once was, but we all know how life gets in our way, right?


Credits:

 Crispy Orange Beef retrieved 1/22/2022 from https://thewoksoflife.com/orange-beef/ 


©2022 Aunt Barbara/ Food Flavors & Fun No Warranties Implied . Attempting techniques described within this blog, or at sites directed from here are done at your own risk, we assume no liability or responsibility for your outcome.